
Windows 11
Download Wallpaper Windows 11 SE

Some time ago Microsoft launched Windows 11 SE, and if you pay attention, this version of Windows 11 presents their new Wallpaper which is special and clearly different from Windows 11 in general, it looks more or less like in the following picture.
How cute isn’t it, colorful wallpapers like this in my opinion are very suitable to decorate Windows 11 SE which is basically a super light version of Windows 11 and installed on devices for education.
So interested in downloading this wallpaper? you can just slide to the following WallpaperHub page.


Installing Windows 11 without an internet connection is a bit different from the usual process of downloading it online. However, it is still possible to install Windows 11 offline. The process can be broken down into several steps to make it simple and straightforward. Here’s how to do it:
Step 1: Prepare your PC
Before you begin, ensure your computer meets the minimum system requirements for Windows 11. You also need a USB flash drive with a minimum of 8GB of storage to create a bootable USB drive. Additionally, make sure you have the Windows 11 installation media, either as a physical DVD or an ISO file on your computer.
Step 2: Create a bootable USB drive
If you have the ISO file, you can use the Media Creation Tool to create a bootable USB drive. To do this, follow these steps:
- Download the Media Creation Tool from the Microsoft website.
- Insert the USB drive into your computer and run the Media Creation Tool.
- Select “Create installation media (USB flash drive, DVD, or ISO file) for another PC.”
- Choose the language, edition, and architecture of Windows 11, then click Next.
- Select “USB flash drive,” and then click Next.
- Choose the USB drive from the drop-down menu, and then click Next.
- Wait for the tool to create the bootable USB drive, which may take a while.
Step 3: Boot your PC from the USB drive
Once the bootable USB drive is ready, you can use it to install Windows 11 on your PC. To do this, follow these steps:
- Turn off your computer and insert the USB drive.
- Turn on your computer and press the appropriate key to enter the boot menu. The key depends on your computer’s manufacturer, but common options are Esc, F2, F8, F10, or F12.
- Select the USB drive from the boot menu, and then press Enter.
- Wait for Windows 11 to load from the USB drive, which may take a while.
Step 4: Install Windows 11
Once Windows 11 is loaded from the USB drive, you can begin the installation process. To do this, follow these steps:
- Click on the Install button to start the setup process.
- Choose the language, time, and currency format, and keyboard or input method, then click Next.
- Click on Install now to continue.
- Accept the license terms and click Next.
- Choose “Custom: Install Windows only (advanced),” and then click Next.
- Select the hard drive or partition where you want to install Windows 11, then click Next.
- Wait for the installation process to complete, which may take a while.
- Configure your settings, such as the username, password, and privacy options, then click Next.
- Wait for Windows 11 to complete the setup process and restart your computer.
Once your computer has restarted, Windows 11 should be installed and ready to use. The process of installing Windows 11 without an internet connection may be a bit different, but it is still straightforward and easy to follow. With the right preparation, you can have Windows 11 up and running on your PC in no time.

If your Windows 11 computer is not shutting down properly, there are several troubleshooting steps you can try to fix the windows not shutting down the issue:
Step 1: Check for updates
Check for updates for Windows 11 by going to the Settings app, selecting “Update & Security,” and then clicking on “Check for updates.” If updates are available, install them and try shutting down your computer again.
Step 2: End running processes
Press the Ctrl+Alt+Del keys and click on the “Task Manager” button. This will open the Task Manager, where you can see all the running processes on your computer. Look for any processes that may be causing the issue and end them by clicking on them and then select “End task.”
Step 3: Disable fast startup
Fast startup is a feature in Windows that speeds up the startup process, but it can sometimes cause issues with shutting down. To disable fast startup, go to the Control Panel and click on “Power Options.” Then, click on “Choose what the power buttons do” and uncheck the box next to “Turn on fast startup.”
Step 4: Check for hardware issues
Make sure that all hardware components of your computer are properly connected and functioning. Check the power cord and battery, and make sure that your computer is not overheating. If you suspect a hardware issue, contact a computer repair professional for assistance.
Step 5: Run a disk check
Sometimes, issues with shutting down can be caused by problems with your computer’s hard drive. To check for these issues, open the Command Prompt as an administrator and type “chkdsk /f” (without the quotes). This will run a disk check and fix any errors that it finds.
Step 6: Run a system scan
Sometimes, issues with shutting down can be caused by malware or other types of harmful software. To check for these issues, run a full system scan using an up-to-date antivirus program.
Step 7: Perform a clean boot
Performing a clean boot can help you identify if any third-party applications or services are causing the issue. To perform a clean boot, press the Windows key + R, type msconfig, and hit Enter. In the System Configuration window, navigate to the Services tab and select “Hide all Microsoft services”, then click on “Disable all”. Then, navigate to the Startup tab, and click on “Open Task Manager”. In the Task Manager, disable all startup items, restart your PC, and try shutting it down again.
Step 8: Perform a System Restore
If the above steps do not solve the issue, you can try performing a System Restore. This will restore your computer to a previous state, undoing any changes that may be causing the issue. To perform a System Restore, go to the Control Panel and click on “System.” Then, click on “System protection” and select “System Restore.” Follow the prompts to choose a restore point and restore your computer.
Conclusion
If your Windows 11 computer is not shutting down properly, there are several troubleshooting steps you can try to fix the issue. These include checking for updates, ending running processes, disabling fast startup, checking for hardware issues, running a disk check, running a system scan, performing a clean boot and performing a System Restore. If none of these steps solve the issue, it may be necessary to contact a computer repair professional for assistance.

Did you know, on windows 11 you can record layer/screen recorder without having to install any application? That’s right, Windows 11 already has a built-in Screen Recording feature where you can take more efficient layer recordings, where you can share the results of this screen recording video directly to video streaming platforms such as YouTube, Twitter, and others.
Not only that, but you can also edit the screen record video first before you share it.
Here’s How to Record Screen in Windows 11 Without Applications:
- Open this Screen Recorder application by pressing the Windows key + G
- Next click the Capture option
- Click the Start Recording button or you can also press the Win + Alt + R keys to start the Screen Recorder capture process.
- To view the screen recordings stored on your Windows 11 PC/Laptop storage, you can go to the Windows Explorer > This PC > Videos > Captures directory.
How to Record Screen in Windows 11 Using Apps
If with the first method above, you feel unsatisfied and feel quite complicated. You can use third-party applications that are more simple and more effective.
One of the applications is the Windows 11 Screen Recorder application which you can download and install for free.


Who Invented Lithium ion Batteries
SHARE More Imagine a world without smartphones, laptops, or electric cars. Crazy, right? These amazing devices rely on a powerful...


Who Invented SSD : A Journey From Invention To Innovation
SHARE More The dominance of Solid State Drives (SSDs) in modern data storage is undeniable. Their lightning-fast performance, superior reliability,...


Google Gemini: Your Super-Smart AI Sidekick (Made Easy!)
SHARE More Imagine a helpful friend who can write emails, translate languages, dream up creative ideas, and even write code!...


Who Invented Gorilla Glass for Mobile: Unveiling the Inventor and Its Impact
SHARE More In the ever-evolving landscape of mobile technology, Gorilla Glass has emerged as a revolutionary material, providing durability and...


The Evolution of Touch Screen Technology: A Journey into its Inventors and Innovations
SHARE More Touch screen technology has become an integral part of our daily lives, seamlessly blending with our smartphones, tablets,...
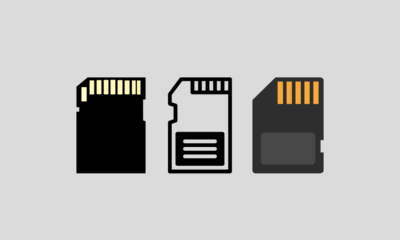

The Evolution of Memory Cards: Unraveling the Inventors Behind the Innovation
SHARE More In the fast-paced world of technology, memory cards have become an indispensable part of our daily lives. From...


Who Invented Sim Card | The Origin and Inventor of the SIM Card: A Revolutionary Communication Breakthrough
SHARE More In today’s digitally interconnected world, the SIM card stands as a tiny yet indispensable component of our daily...


Who invented Walkie-Talkie | Exploring the Wonders of Walkie-Talkies: A Simple Guide for Beginners
SHARE More Walkie-talkies, often fondly referred to as “woki tokies,” are incredible communication devices that have stood the test of...


Who Invented Camera Lens : A Revolutionary Innovation in Photography
SHARE More The invention of the camera lens stands as a pivotal milestone in the history of photography, fundamentally altering...


The Evolution of Radio Broadcasting: Who Invented Radio?
SHARE More Radio broadcasting has been a cornerstone of communication, entertainment, and information dissemination for over a century. It revolutionized...
-
 Phones5 years ago
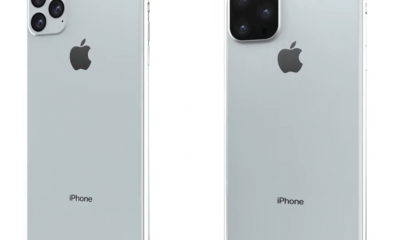
Apple iPhone 11 (2019) – Release, Info, Leaks, Rumors
-
![Huawei's New Operating System is HarmonyOS [ Officially ],harmony os,huawei new operating system, huawei harmony OS,](https://www.thedigitnews.com/wp-content/uploads/2019/08/Screenshot__2285_-removebg-preview-2-1-400x240.png)
![Huawei's New Operating System is HarmonyOS [ Officially ],harmony os,huawei new operating system, huawei harmony OS,](https://www.thedigitnews.com/wp-content/uploads/2019/08/Screenshot__2285_-removebg-preview-2-1-80x80.png) Phones5 years ago
Phones5 years agoHuawei New Operating System is HarmonyOS [ Officially ]
-

 News5 years ago
Belle Delphine bath water – Instagram Model Sells Used Bathwater For 30$ To Their Loyal Followers
-

 Tech5 years ago
Levi’s Bluetooth Jacket Lets You Control Your Smartphone