How-To
How to download apps on iPad
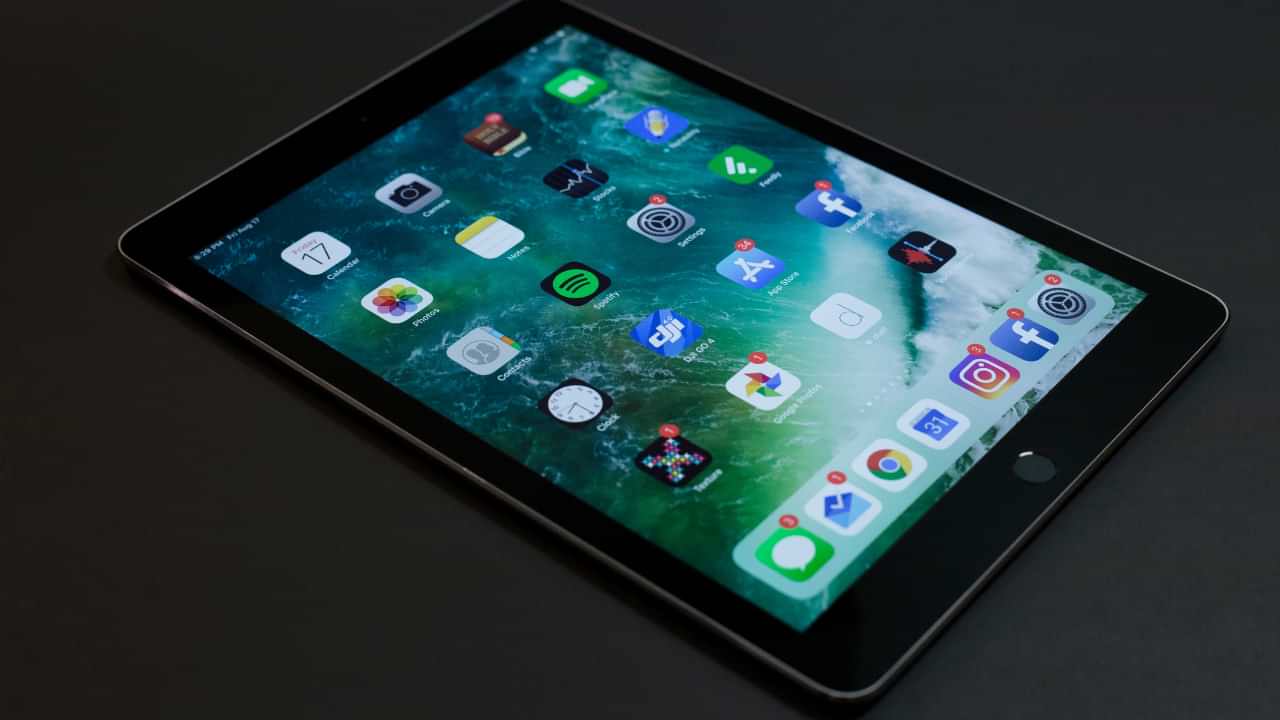
When a user acquires an iPad for the first time, one of the basic actions they need to know and know how to do is to download applications, since it is the only way to get the most out of this device. In this post, we will tell you all the ways to do it, as well as we will resolve the frequent doubts regarding this practice.
Steps to download apps on iPad
Let’s go through the different ways that all iPad users can use to download apps from the App Store, which is Apple’s app store. Fortunately, there are many and varied apps you will be able to find, and this is undoubtedly one of the most outstanding points with this device, how well equipped it is in terms of usability thanks to all the apps you can to download.
Download free apps
Within the App Store you have different types of applications, those that are completely free, those that you can download for free, but then have some paid features, and finally, those that are paid for. In this section we will focus on the first two, ie on the applications, you will be able to download for free. The steps to implement it are very simple, and Apple is always characterized by making things very easy for all users of the services and equipment. Below you have them in detail.
- On your iPad, open the app store.
- Select the application you want to download or search for it through the app’s own search engine.
- Click on ” Take “.
- Enter a password or use Face ID or Touch ID to confirm the download.
- Otherwise, click Cancel.
With these simple steps you have already started downloading your application, and depending on both your weight and your internet connection, the time it will take to download and install will vary. However, it is common for you to have your app fully available on your device in a few seconds.
Download paid app
We have already told you about the steps you need to follow if you want to download free apps from the App Store, now is the time to talk about apps that cost money. The first thing you need to know is that you either need to have a payment method set up in your iCloud account, or have enough money in the App Store to cover the cost of the application. Once you have checked this aspect, we will proceed with the steps you need to complete to enjoy the application on your iPad.
- Open the App Store.
- Select the application you want to download or search for it through the app’s own search engine.
- Next to the app, its price will be displayed.
- To start the download, click on the price displayed on the screen.
- Enter a password or use Face ID or Touch ID to confirm the download.
- Otherwise, click Cancel.
Once you complete these steps, the app fee will be transferred to you, and the app will automatically begin downloading and installing itself on your iPad. A very important point that you need to keep in mind and that not many users are aware of is that just as Apple offers you a 14-day trial for its various devices, the same thing happens with the applications, so if during this period you regret to Having purchased this application, you can return it without any problems and the Cupertino company will refund the full amount.
Download paid apps for free
It is obvious that all the money you can save is welcome, so we think it is very appropriate to tell you about a way you can save a lot of money if what you want is to download apps that cost money without paying a single euro. This is possible if you have “In Family” configured and other members have previously purchased the application. Although another option is that if several of the members are interested in a specific app, they can buy it among them all to share the cost.
Anyway, what’s really important and that you need to be very clear on is that the Cupertino company allows you to buy shares in the App Store. Therefore, just as the subscription to Apple Music, Apple TV +, and other services can be shared in Family, the purchase of paid apps can also be shared. To do this, family members who want to take advantage of this must enable shared purchases in their iCloud profile. To do this, they just need to follow the following steps.
- Open the Settings app on your iPhone or iPad.
- Tap your iCloud profile.
- Click on “Family”.
- Select “Share Purchase.”
- Turn on “Share shopping with family”.
Once these steps are completed, all purchases of paid apps that a user has made available to the rest of the members will be free. This is without a doubt a very good way to save a good deal of money on applications that can be very useful for all family members.
Tips to consider
Once you know what the steps are and all the ways to be able to download applications on iPad, we will tell you some tips that are guaranteed to come in handy when it comes to downloading applications, both on iPad and on iPhone or other devices from the Cupertino company .
- The internet connection you have is crucial to be able to download both correctly and in the shortest possible time. Therefore, make sure that the Wi-Fi connection you have is of good quality, or on the contrary, if you are going to download with mobile data, that the coverage is good enough.
- Applications take up space within the devices, so it is convenient that you always do a good review of the apps you have installed, as it may happen that you want to install a new one that you urgently need and you do not have enough space for it.
- If you are going to download a paid app, make sure you have all the payment methods properly configured so that the purchase can be completed properly.
How-To
How to Fix Blurred Images/Photos on Android Phones

Why your photos can be blurry (blurred) There are several factors that cause them, including: When taking photos it is unstable (shaky), the object you are photographing is a moving object, the camera lens is dirty, the camera application is not functioning properly and several other causes.
How to Fix Blurry Pictures Taken from Android Phone:
1. Use an app to fix blurry photos
Most image editing apps include a useful function to sharpen photos, this feature you can use to improve your Android photos.
As for the method, I have discussed it in a previous article here
Or you can also try other apps like VanceAI and Neural. love, Let’s Enhance, and MyEdit
2. Take precautions so that the photos are not blurry
Tips for preventing blurry images on Android phones, there are several things you can try to prevent this, including:
- Clean your phone lens
- Take photos in better lighting conditions
- Delete the Camera application cache, go to the menu: Settings > Storage > Devices > Cached data > Clear cached data > OK.
- As much as possible, avoid excessive zoom functions when taking photos on an Android cellphone camera.
How-To
How to Fix Spotify AI DJ Not Showing

As a music streaming service, Spotify has revolutionized the way we listen to music. One of its most exciting features is the AI DJ, which creates custom playlists based on your music preferences. However, sometimes users encounter an issue where the AI DJ feature is not showing up. In this article, we will go through a step-by-step guide on how to fix this issue.
Step 1: Check for Updates
The first thing you should do is check if your Spotify app is updated. If not, update it to the latest version. This may resolve any glitches or bugs that are causing the AI DJ feature to disappear.
Step 2: Clear Cache
Clearing the cache on your Spotify app may also help resolve this issue. To do this, go to your app settings and select “Storage.” From there, tap on “Clear Cache” and restart your app.
Step 3: Disable Battery Saver
Sometimes, battery saver settings can interfere with the app’s performance. To disable the battery saver, go to your phone’s settings and select “Battery.” From there, disable any battery-saving modes that are enabled.
Step 4: Check the Internet Connection
Make sure that you have a stable internet connection. If your internet connection is slow or unstable, the app may not be able to load the AI DJ feature.
Step 5: Check Country Settings
Spotify’s AI DJ feature is not available in all countries. If you’re using the app in a country where this feature is not available, it may not appear on your app. You can check the list of countries where the AI DJ feature is available on the Spotify website.
Step 6: Check the Subscription
The AI DJ feature is only available to Spotify Premium subscribers. If you’re using the free version of the app, you may not be able to access this feature.
Step 7: Reinstall the App
If none of the above steps work, you can try uninstalling and reinstalling the app. This will reset the app to its default settings, which may resolve any issues that were causing the AI DJ feature to disappear.
Step 8: Restart Your Device
If the issue persists, try restarting your device. This can help fix any software issues that may be causing the problem. Here’s how to do it:
- Press and hold the power button on your device.
- Tap on the “Restart” option when it appears on the screen.
- Wait for your device to restart, and then try opening the Spotify app again.
Step 9: Contact Spotify Support
If the issue persists after trying all the above steps, it’s time to contact Spotify support. You can reach out to them through their website, and they will guide you through resolving the issue.
Conclusion
Spotify’s AI DJ feature is a great way to discover new music based on your preferences. However, it can be frustrating if it’s not showing up on your app. By following the steps outlined above, you should be able to resolve the issue and get back to enjoying your music. Remember to check for updates, clear cache, disable battery saver, check internet connection, country settings, and subscription, and reinstall the app. If all else fails, don’t hesitate to contact Spotify support.
How-To
How to Overcome steam error code e84
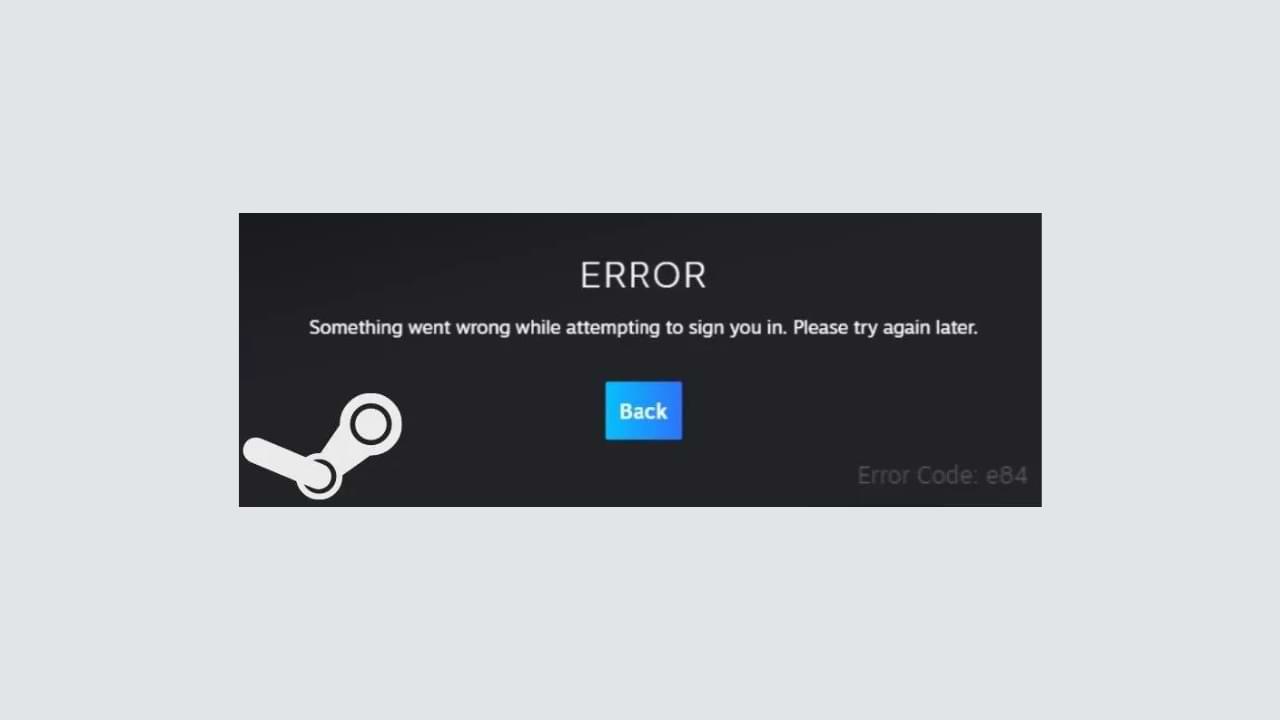
The steam error code e84 problem usually occurs when we are about to log into the Steam platform, this error is also accompanied by Something that went wrong while attempting to sign you in.
If you are currently experiencing the same error. So in this article, we are going to provide you with the repair solution with the simplest way to fix it.
1. Delete Temporary Files
Temporary Files on your computer can sometimes make Steam run improperly. One is the steam error code e84, so try deleting temporary files from your computer. To do so, follow these steps:
- Press the Windows key + R then type the command %temp% and press the Enter / OK key
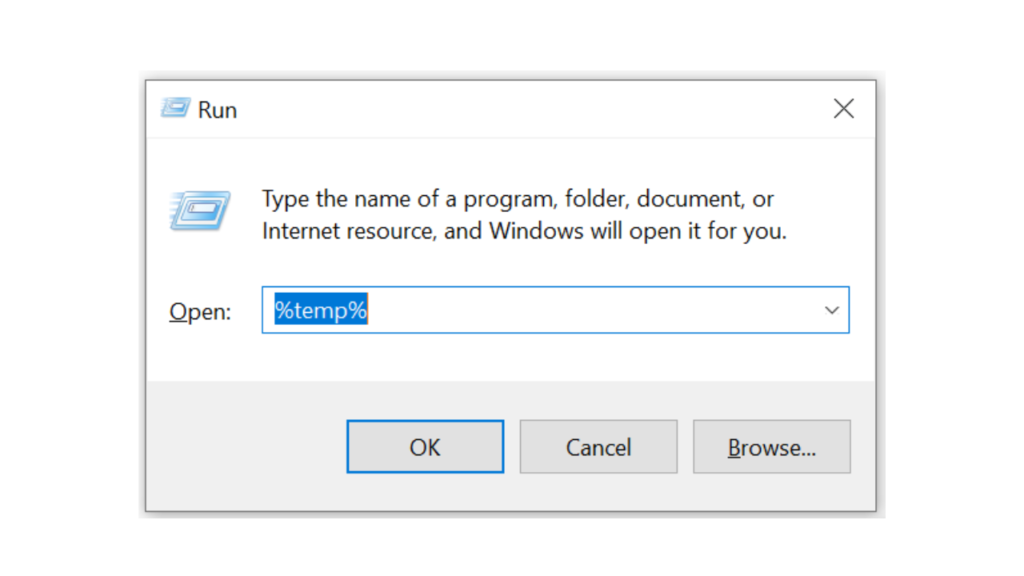
- Then delete all files and folders in the temp folder
- After that, try restarting your computer, and try opening Steam, is the error code E84 still there?
Deleting all of these folders will not cause errors or damage to the computer/programs on your computer, because all the files in this temp folder are temporary files that are no longer needed.
2. Update the Steam Application
Check if there is an update available for the steam application, if there is, please update immediately. And after the update is complete, try opening the Steam application again.
3. Reinstall the Steam App
If the two methods above don’t work, there could be some problematic or damaged Steam system files. The best solution is to reinstall the Steam application.
-

 Phones5 years ago
Apple iPhone 11 (2019) – Release, Info, Leaks, Rumors
-
![Huawei's New Operating System is HarmonyOS [ Officially ],harmony os,huawei new operating system, huawei harmony OS,](https://www.thedigitnews.com/wp-content/uploads/2019/08/Screenshot__2285_-removebg-preview-2-1-400x240.png)
![Huawei's New Operating System is HarmonyOS [ Officially ],harmony os,huawei new operating system, huawei harmony OS,](https://www.thedigitnews.com/wp-content/uploads/2019/08/Screenshot__2285_-removebg-preview-2-1-80x80.png) Phones5 years ago
Phones5 years agoHuawei New Operating System is HarmonyOS [ Officially ]
-

 News5 years ago
Belle Delphine bath water – Instagram Model Sells Used Bathwater For 30$ To Their Loyal Followers
-

 Tech5 years ago
Levi’s Bluetooth Jacket Lets You Control Your Smartphone


