
Internet
How to put Google Discover on an iPhone

If you want to be informed about all the news without having to search for the news one by one, the solution is Google Discover. Thanks to this Google extension, you will be able to have all the news about your favorite topics, and best of all, you will also be able to have them on your iPhone. In this post, we tell you how to do it.
What is Google Discover?
This functionality of Google gives you information about your settings without you asking for it. When you open the Google app, you will see a list of relevant news on the topics you are interested in, whether it is your favorite football team, your favorite music style, or the news that may interest you the most.
You can find Discover in two ways. The first is on an iPhone or iPad, open the Google app. The other is by opening the browser and going to google.com. Once here, you will need to access your Google Account and you will be able to configure the Discover option. The difference between this feed and the search engine is that Discover is designed to be personal and tailored to what the user is looking for.
The content is automatically updated when new information on these topics becomes available. But in the search engine, you have to be the one looking for specific things you are interested in, and the latest news does not always appear, nor is it updated automatically. Discover does not return search results but returns them automatically.
How to customize Discover
Before you can customize Discover, you must have a Google Account and access the browser, either from its own app or from another browser, but always using Google. To start managing your content in Discover, choose one of the following options, depending on which browser you use will be one or the other.
- Chrome: Go to Manage suggested articles.
- A Google app or google.com: Follow the steps below to choose what information you want to receive, follow or stop following.
Step 1: Turn on the web and app activity setting
The web and app activity setting saves your searches, browser history, and other types of activity in your Google Account.
- Open the Google app on an iPhone or iPad.
- Tap your top right profile picture or initial and luego search activity.
- Tap Activity saved.
- Turn on web and app activity settings.
Step 2: Select the news you want to receive
If you’re looking for something you’re interested in, you can follow that topic to get news about it on Discover.
In the Google app
- Open the Google app on an iPhone or iPad.
- Tap your top right profile picture or initials and luego settings.
- Point Interests and luego Your interests.
- To follow new topics, go to “According to your activity” and press Add.
- To hide a topic in Discover, tap Lock.
in the browser
- On an iPhone or iPad, open your browser and go to google.com.
- Press Menu at the top left and luego the settings.
- Press under «Discover». Manage interests and luego Your interests.
- To follow new topics, go to “According to your activity” and press Add.
- To hide a topic in Discover, tap Lock.
Step 3: Change how often you see topics in Discover
NOTE: Only you can see the news you like, but your choices can be shared anonymously with editors.
Open the Google app on your iPhone or iPad or go to google.com in your browser.
Tap Like at the bottom right of the card you select.
This determines what is displayed in Discover
To find out what’s going on in Discover, Google uses information from your device and other Google products.
In addition, Google uses the data stored in your Google Account. This data is retrieved from the settings that you can change, enable or disable. These settings include:
- Activity online and in applications. Learn how to view and control activity data online and in apps.
- Information about the apps on your devices. Learn how to manage app information on your devices.
- Information about the contacts of your devices. Learn how to manage contact information on your devices.
- Position history. For Google to use this information, the web and app activity settings must be turned on. Learn how to change the Google app’s location settings.
- Location settings: Some of the information displayed in Discover is selected based on your home location. Learn how to set home and work locations. If your home location is not available, Google may estimate your location using other sources, such as your IP address. Understand and manage your location when you search on Google
How to access the news
Accessing it is very easy and there are several methods. The first is to use the Google application installed on your phone, a colored G icon that takes us to the search engine and automatically shows us the Discover section with all the content that may be of interest to us or that the search engine thinks. . But that is not the only option we have access to.
For example, some devices allow us to swipe right from the Home screen or to enter Discover. And other Android phones and tablets show us directly if we open the Google.com site from the browser, and here they will show us all the news and developments.
So you can disable Discover
If you no longer want to use Discover or disable it, follow two simple steps. Like the previous configuration, you have two options, depending on whether you do it from the Google application or if you do it from another browser.
In the Google app
- Open the Google app on an iPhone or iPad.
- Tap your top right profile picture or initials > settings > general.
- Turn off Discover.
- in the browser
Please note that this feature may not be available in all languages and countries.
- Go to google.com on an iPhone.
- Tap Menu> Settings> Discover > Do not show on the home page .


In today’s digital age, expressing ourselves creatively is more important than ever. One fun and engaging way to do this is by using fancy fonts to enhance the appearance of our text. If you’re looking to add a touch of uniqueness to your social media posts, captions, or any other written content, you’re in luck! Several websites offer free and user-friendly fancy font generators that can instantly transform your plain text into eye-catching designs. In this article, we’ll explore some of the top fancy font generator sites that can help you stand out in the online crowd.
1. Aesthetic-Symbol.com
Text symbols have evolved into a new form of visual communication, allowing individuals to convey emotions, concepts, and ideas with a single character. Aesthetic-Symbol.com takes this concept to the next level by curating an extensive collection of symbols that resonate with various themes and moods.
- Social Media Magic: Elevate your social media game by using these symbols to enhance your captions, comments, and bios. Express emotions, add emphasis, or even create stylish dividers between sections of your content.
- Text Messages with a Twist: Surprise your friends with creatively designed symbols that add a touch of novelty to your text messages. Birthdays, celebrations, or just a friendly “hello” – there’s a symbol for every occasion.
- Personal Branding: In the digital era, personal branding matters. Aesthetic-Symbol.com allows influencers, bloggers, and professionals to incorporate unique symbols into their branding materials, making their content instantly recognizable.
- Artistic Endeavors: Creative minds can use these symbols to enhance digital artwork, presentations, and graphics. With a wide range of choices, the possibilities are limited only by imagination.
2. LetrasparaNick.com and Letrasdiferentesparanick.com
If you’re active on platforms like Instagram, TikTok, or Twitter, you know the importance of a captivating username or nickname. LetrasparaNick.com and Letrasdiferentesparanick.com specialize in generating unique fonts that you can use to make your username pop. From fancy script fonts to creative symbols, these websites make it easy to customize your online identity.
3. Fuentesletras.com and Fontesparainstagram.com
Fuentesletras.com and Fontesparainstagram.com cater to those looking for fonts tailored for Instagram. With the visual-centric nature of this platform, having fonts that stand out is crucial. These websites offer a range of fonts that suit different moods and themes, helping you make your posts and stories more visually appealing.
4. ConvertidordeLetras.com and Fontesparaig.com
ConvertidordeLetras.com and Fontesparaig.com are versatile fancy font generator sites that provide fonts suitable for various purposes. Whether you’re crafting an email signature, designing a poster, or creating unique graphics for your blog, these websites offer a plethora of font options to choose from.
5. Letrasgoticas.com and Conversoresdeletras.com
Letrasgoticas.com and Conversoresdeletras.com can make different styles of fonts that look cool. You can use these fonts for lots of things like making an email signature, designing a poster, or creating special pictures for your blog. These websites have many font options to pick from.
Conclusion
Expressing your individuality and creativity through your text has never been easier, thanks to the plethora of fancy font generator sites available online. Whether you’re looking to add a touch of elegance, playfulness, or uniqueness to your text, these websites have the tools you need. Websites like Aesthetic-Symbol.com, LetrasparaNick.com, Letrasdiferentesparanick.com, FontesLetras.com, Fontesparainstagram.com, ConvertidordeLetras.com, and Fontesparaig.com are just a few examples of the many resources at your disposal. So go ahead and explore these platforms to transform your ordinary text into something extraordinary!
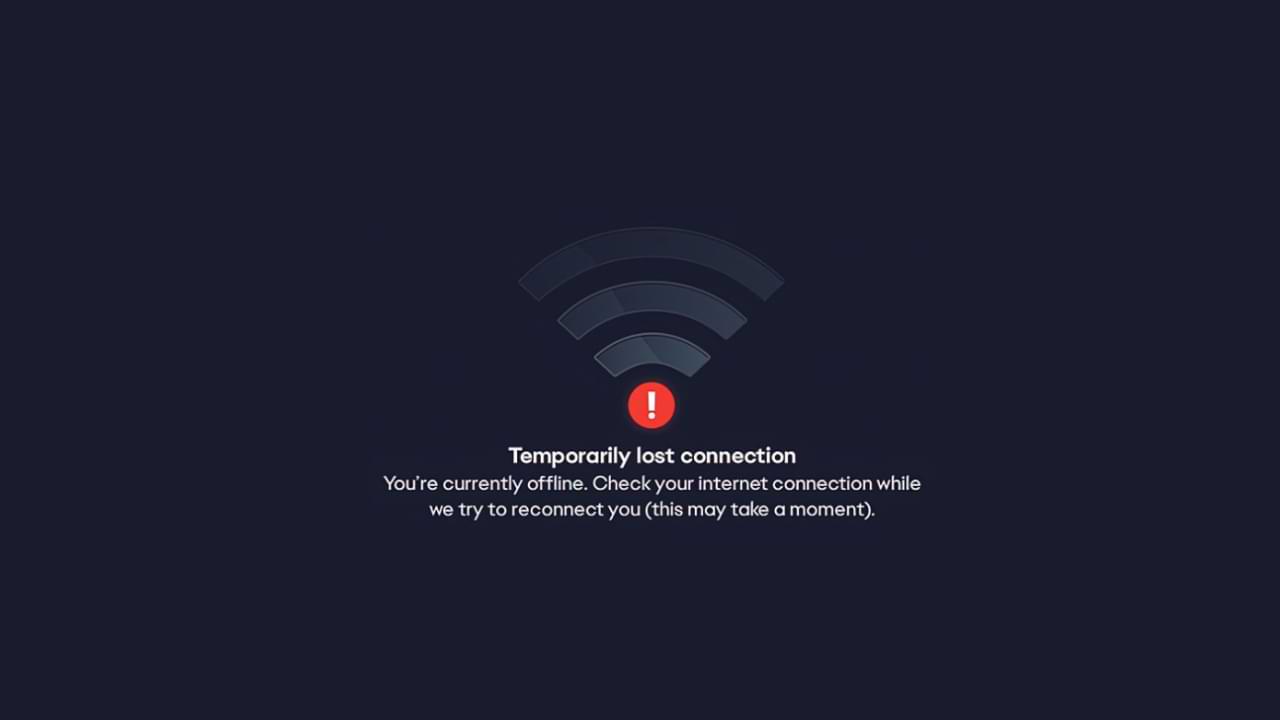
The temporarily lost connection problem is a Temporarily Lost Connection error when launching the EA application. There are quite a number of games made by EA that cannot be played due to the appearance of this error.
It looks like this problem is on the EA side, so there’s not much you can do to fix it, but there are a few tips you can do.
However, we have some suggestions that can help solve the problem. How to fix EA temporarily lost connection error Usually caused by EA server connectivity.
Some things you can do to overcome this are:
- The first step, make sure to link your Steam and EA accounts.
- Then, run the EA application as an administrator.
- Restart your PC/Laptop
- Also, restart your router and modem.
- Uninstall the EA app and reinstall it.
- Ensure that EA applications are allowed through your firewall and anti-virus software.
- Finally, check if your router is blocking the connection to the EA server.
These are common fixes you can make. If, in the above way the error still appears. We can confirm that the cause of the problem is not on you. However, there is a problem with the EA Server. The best solution for this is to wait a while, as usually, problems like this don’t last that long.
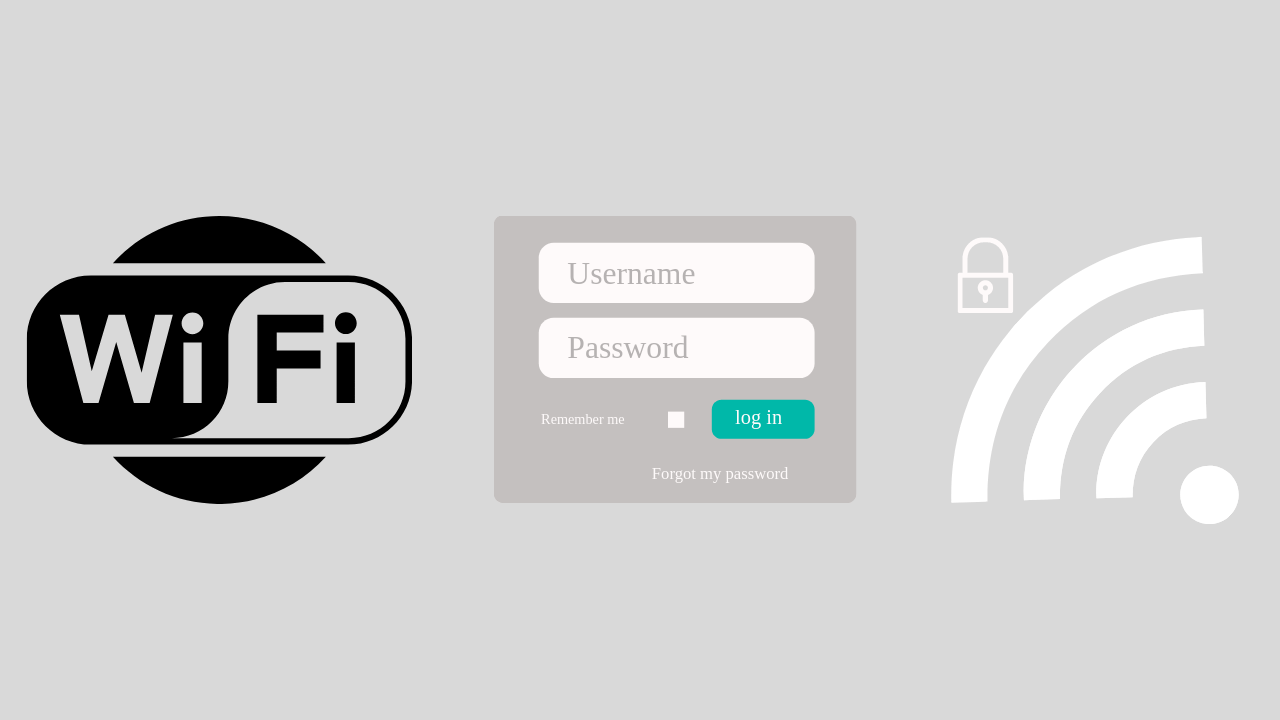
If you open WIFI at a school, cafe, airport, or hotel, you are usually asked to enter username and password login information first. Usually, this login information will be given to you beforehand.
Maybe you have or are currently experiencing a problem where there is no login display at all when accessing wifi. Then this article will help you to overcome it.
Here is a solution to overcome Wifi that can’t log in:
1. Restart your Device
This solution is easy solution and can be done by anyone.
What you need to do is:
- Disconnect from the network and turn off your Wi-Fi.
- Log out of the user account on your computer and shut down the system.
- Restart the device and log back into your user account.
- Turn on your Wi-Fi and connect to the network once again. See if the login page will now appear in your browser.
2. Use Public DNS
The next method is to use public DNS, how to set it up, follow these steps:
- To change a Wi-Fi network, go to Settings menu > Network Settings. Select the Wi-Fi network you want to change the DNS for, long press on the network name, and select ‘Modify Network ‘
- Then in the “ IP Settings” option. Usually, it will read ‘DHCP‘. Change it to ‘Static’, and you will be able to input the DNS IP manually you will use.
- Then enter DNS 8.8.8.8 and 8.8.4.4
3. Use a VPN App to solve the WIFI Login problem
When you join a WiFi hotspot with a login page, the VPN app will display information asking if you want to log in.
4. Forget the WIFI Network and Reconnect
Go to your device Settings and tap on WiFi > Find a network that you are having trouble connecting to a WiFi network > Long press on the network either SSID /Network Name, then you will see a small window with options to forget the network or modify network configuration. You can simply Tap on Forget Network option and then reconnect.


Who Invented Lithium ion Batteries
SHARE More Imagine a world without smartphones, laptops, or electric cars. Crazy, right? These amazing devices rely on a powerful...


Who Invented SSD : A Journey From Invention To Innovation
SHARE More The dominance of Solid State Drives (SSDs) in modern data storage is undeniable. Their lightning-fast performance, superior reliability,...


Google Gemini: Your Super-Smart AI Sidekick (Made Easy!)
SHARE More Imagine a helpful friend who can write emails, translate languages, dream up creative ideas, and even write code!...


Who Invented Gorilla Glass for Mobile: Unveiling the Inventor and Its Impact
SHARE More In the ever-evolving landscape of mobile technology, Gorilla Glass has emerged as a revolutionary material, providing durability and...


The Evolution of Touch Screen Technology: A Journey into its Inventors and Innovations
SHARE More Touch screen technology has become an integral part of our daily lives, seamlessly blending with our smartphones, tablets,...

The Evolution of Memory Cards: Unraveling the Inventors Behind the Innovation
SHARE More In the fast-paced world of technology, memory cards have become an indispensable part of our daily lives. From...

Who Invented Sim Card | The Origin and Inventor of the SIM Card: A Revolutionary Communication Breakthrough
SHARE More In today’s digitally interconnected world, the SIM card stands as a tiny yet indispensable component of our daily...
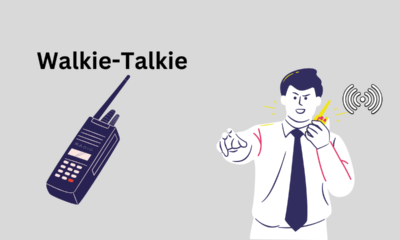

Who invented Walkie-Talkie | Exploring the Wonders of Walkie-Talkies: A Simple Guide for Beginners
SHARE More Walkie-talkies, often fondly referred to as “woki tokies,” are incredible communication devices that have stood the test of...


Who Invented Camera Lens : A Revolutionary Innovation in Photography
SHARE More The invention of the camera lens stands as a pivotal milestone in the history of photography, fundamentally altering...


The Evolution of Radio Broadcasting: Who Invented Radio?
SHARE More Radio broadcasting has been a cornerstone of communication, entertainment, and information dissemination for over a century. It revolutionized...
-

 Phones5 years ago
Apple iPhone 11 (2019) – Release, Info, Leaks, Rumors
-
![Huawei's New Operating System is HarmonyOS [ Officially ],harmony os,huawei new operating system, huawei harmony OS,](https://www.thedigitnews.com/wp-content/uploads/2019/08/Screenshot__2285_-removebg-preview-2-1-400x240.png)
![Huawei's New Operating System is HarmonyOS [ Officially ],harmony os,huawei new operating system, huawei harmony OS,](https://www.thedigitnews.com/wp-content/uploads/2019/08/Screenshot__2285_-removebg-preview-2-1-80x80.png) Phones5 years ago
Phones5 years agoHuawei New Operating System is HarmonyOS [ Officially ]
-

 News5 years ago
Belle Delphine bath water – Instagram Model Sells Used Bathwater For 30$ To Their Loyal Followers
-

 Tech5 years ago
Levi’s Bluetooth Jacket Lets You Control Your Smartphone