Windows 10
How to hide files and folders from search box results in Windows 10

The files and folders found in the Windows 10 search box belong to the computer’s hard drive. All this makes it easier to access folders and to have documented more quickly.
Sometimes you get documents in search results that you don’t want to have in the box. This can be modified and even access to certain folders or files be removed.
Given by privacy interests or require other folders in the search, there are different ways to do it. Windows 10 allows this alternative, so you can use whichever one suits you best.
Most common alternatives to modify the Windows 10 search box
Enter indexing options
It is a way that helps to remove files from indexing or modify some that are there. Entering this option you proceed to indicate what you do not want to be indexed, doing it in the following way:
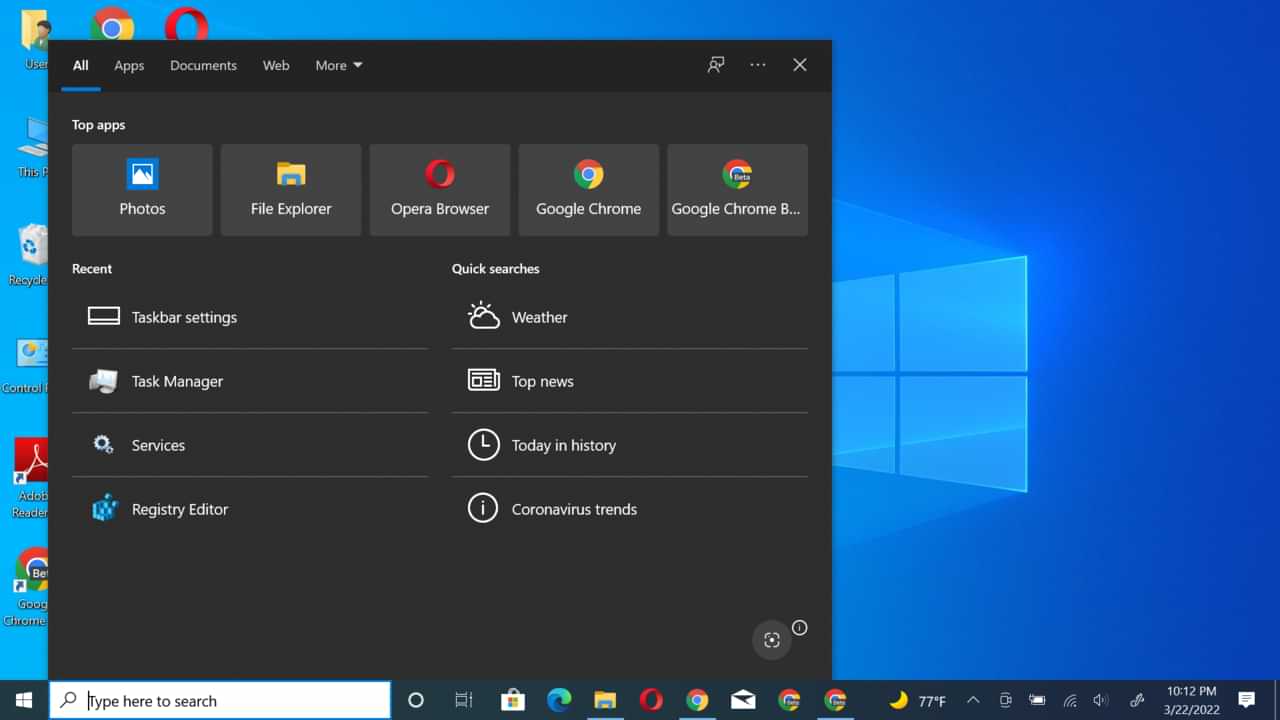
- The Windows 10 search or search box opens on the taskbar. There you enter ” Indexing Options “, clicking on the result that appears on the screen.
- When pressing ” Advanced options “, a new window will open in which ” File types ” will be pressed. You will get a list of the types of files that are in the computer searches.
- The list will look for the types of files that you do not want to have, marking the corresponding boxes. Click on ” OK ” and a window will pop up asking if you want the changes in Windows 10.
- There you will click ” OK ” again, noting that the files no longer appear in the search results. In case the changes are not set, it may be necessary to restart the computer to finish the confirmation.

Go to the properties of the file or folder
By changing the option to ” Hidden “ from the properties window, it can also be used as a method to change the search. This ensures that you do not leave the files or folders hidden in the Windows 10 search.
All this will be possible if they are found in folders indexed throughout the search system. You must go to said folder or file and press the right button on the element, entering its “Properties”.
In the pop-up window, check the “Hidden” box and then press “OK”, culminating in the process. The item will not be visible by the browser or by the results in the search box in Windows 10.
Important considerations when modifying the search engine
Rebuilding the index is important when deleting files or folders in the search box. If all the files are removed, some new files should be put in and a new index built.
It is recommended that the new folders or files be some that are used frequently on the computer. It makes them useful and doesn’t need to change the index too often.

This can be done from the indexing options, so different elements can be chosen. With Windows 10 it is necessary to access the “Advanced” option, having the administrative rights to do so.
If a password is requested, it must be entered and index rebuilding is done easily. A window warns that the process may take a while, so you must click on “Okay”.
Thus, the process of creating the new search index with the dimensions and new relevant computer sites will have been completed.
Windows 10
Drag and Drop Not Working on PC

Drag and drop is a feature that is commonly used in most computer programs. This feature allows the user to easily move files, folders, images, or other elements from one location to another by simply dragging and dropping them with the mouse.
However, at times, the drag-and-drop feature may not work as expected, leaving the user frustrated and unable to complete their task. This guide will provide you with a step-by-step solution to solve the issue of drag and drop not working.
1. Check your Operating System
Before troubleshooting drag and drop, it is important to make sure that your operating system (OS) is up-to-date. A software bug or compatibility issue can prevent drag and drop from functioning correctly. If your OS is out of date, go ahead and update it to the latest version. If you are using a Windows operating system, open Windows Update and install any available updates. If you are using a Mac, go to the App Store and update your MacOS.
2. Disable Running Programs
Another possible cause of drag and drop not working is having too many programs running simultaneously. If you have multiple programs open, it can slow down your computer and cause drag and drop to become unresponsive. To resolve this issue, close any unnecessary programs and then try drag and drop again.
3. Restart your Computer
Sometimes, the simplest solution is the best solution. Restarting your computer can help to reset any software bugs that may be affecting drag and drop. Simply shut down your computer, wait for a few seconds, and then turn it back on. Try dragging and dropping again to see if it is now working.
4. Check the Application Settings
Sometimes, drag and drop not working is caused by an issue with the application you are using. Check the settings of the application to see if there are any options that may be affecting drag and drop. For example, in a file management system, you may need to change the settings to allow drag and drop.
5. Disable Touchpad
If you are using a laptop, your touchpad may be interfering with drag and drop. Touchpads are often sensitive, and even a small movement can disrupt the drag-and-drop process. To resolve this issue, disable the touchpad temporarily and use an external mouse instead.
6. Try a Different Browser
If you are trying to drag and drop files or elements on a website and it is not working, try using a different browser. Different browsers may have different settings or capabilities that can affect drag and drop. Try using Google Chrome, Mozilla Firefox, or Microsoft Edge to see if drag and drop is working in any of these browsers.
7. Check for Conflicts with Other Programs
Sometimes, drag and drop may not work due to a conflict with another program. For example, antivirus software or firewall settings can prevent drag and drop from functioning properly. Try temporarily disabling any antivirus software or firewalls to see if this resolves the issue.
8. Disable Add-ons or Extensions
If you are using a browser, add-ons or extensions may be causing drag and drop to not work. Try disabling any add-ons or extensions that may be interfering with drag and drop, then try it again. You can also try using Incognito or Private mode in your browser, as these modes only run the essential browser features and do not run any add-ons or extensions.
9. Check for software updates
Software updates can fix any bugs or compatibility issues that may be causing the drag-and-drop feature to not work. To check for software updates, click on the ‘Start’ button, select ‘Settings’, and then ‘Update & Security’. Check if there are any updates available for your operating system or for the program in which you are trying to use the drag-and-drop feature.
10. Disable any antivirus software
Antivirus software can sometimes interfere with the drag-and-drop feature. To check if this is the issue, temporarily disable the antivirus software and try using the drag-and-drop feature again. If the feature starts working, then the issue is with the antivirus software. Contact the antivirus software support for further assistance.
11. Check the Mouse Settings
If the software settings do not resolve the issue, the next step is to check the mouse settings. Sometimes the drag-and-drop functionality may be disabled in the mouse settings, or the mouse may be configured incorrectly. To check the mouse settings, follow these steps:
- Go to the control panel and select the mouse option.
- Check if the drag-and-drop option is enabled.
- If the option is not available, try updating the mouse driver or checking the manufacturer’s website for any updates.
12. Use a Different Mouse
If the computer restart does not resolve the issue, the next step is to try using a different mouse. If the mouse is causing the problem, using a different mouse should resolve the issue. To use a different mouse, follow these steps:
- Connect a different mouse to the computer.
- Try the drag-and-drop functionality to see if it is now working.
- If the issue is resolved, the original mouse may be faulty and will need to be replaced.
Windows 10
How to change the username in Windows 10

If you want to know how to change your username in Windows 10, This article will show you how. We will decode all stages you need to follow to achieve this step by step.
We will teach you a few methods to choose the one that seems most convenient and accessible to you. Likewise, all of them are pretty simple to make so that you won’t have many inconveniences.
Change your Windows 10 username
The first method we’ll use is quite simple, and we’ll do it from Settings. It’s not very complicated, so it’s probably the easiest.
On the 1st we will hit the Windows + I keys to enter the Settings section.
Now you should go to the accounts section. After that, go where it says Manage my Microsoft account.
If you look to the left below your profile picture, you will find an option that says More options. You have to click on that option.
Now a couple of options open up. You have to do is hit where it says Edit Profile.
The username you are using now will appear. Just click where it says Change Name.
All you have to do is edit the Full Name fields with the new ones you want to use. When finished, you must press Save for all changes to be saved. To complete, just restart your computer, and you’re done.
How to change the Windows 10 username in the account manager
This method is also quite simple, and we’ll see it further.
You need to go to Start and then type ” netplwiz. ” Now just hit Enter.
A new menu called User Account will appear. You have to select the one you want to rename and choose Properties.
Now you need to enter the first and last name you want to have. After that, tap where it says Apply and Accept later.
How to change the username of Windows 10 from the control panel
This is also quite simple from the control panel, and you need to follow the steps I will leave for you below.
First, hit the Windows key or go to Start, then type ” Control Panel.” As soon as it appears among the results, hit enter.
Now you need to go to User Account and after that press where It says Change account type.
The name you are currently using appears. Here it remains only to select the Rename account option.
To finish, you need to enter the new name you want to have and at the end, just click Save.
Windows 10
How to Turn Off Search Highlights in Windows 10

Previously, it was reported that Microsoft released Update KB5011543 for Windows 10 21H2, which in the update brought a new feature called Search Highlights.
Now, this feature itself, as I have said before, this feature is a feature similar to the feature that was recently introduced in Windows 11, which in short, this feature will give you a highlight in Windows Search and will display information about what is possible.
You want to see, such as information that is relevant and under what you want based on Microsoft’s AI technology related to privacy settings that you can set beforehand.
But what if you don’t like this feature? Because after all, Microsoft will continue to share today’s moment, daily content, Microsoft Rewards, and Trending search in your Windows Search page based on your device fingerprint.
So, here are the steps to turn off Search Highlights in Windows 10.
Step 1. Please right-click the Taskbar in Windows 10
Step 2. Next, select the Search menu > Uncheck the Show search highlights.
It’s done. After you have done the above steps, Search Highlights in Windows 10 has been successfully removed.
-

 Phones5 years ago
Apple iPhone 11 (2019) – Release, Info, Leaks, Rumors
-
![Huawei's New Operating System is HarmonyOS [ Officially ],harmony os,huawei new operating system, huawei harmony OS,](https://www.thedigitnews.com/wp-content/uploads/2019/08/Screenshot__2285_-removebg-preview-2-1-400x240.png)
![Huawei's New Operating System is HarmonyOS [ Officially ],harmony os,huawei new operating system, huawei harmony OS,](https://www.thedigitnews.com/wp-content/uploads/2019/08/Screenshot__2285_-removebg-preview-2-1-80x80.png) Phones5 years ago
Phones5 years agoHuawei New Operating System is HarmonyOS [ Officially ]
-

 News5 years ago
Belle Delphine bath water – Instagram Model Sells Used Bathwater For 30$ To Their Loyal Followers
-

 Tech5 years ago
Levi’s Bluetooth Jacket Lets You Control Your Smartphone


