How-To
How to master Microsoft Teams: 10 key tricks
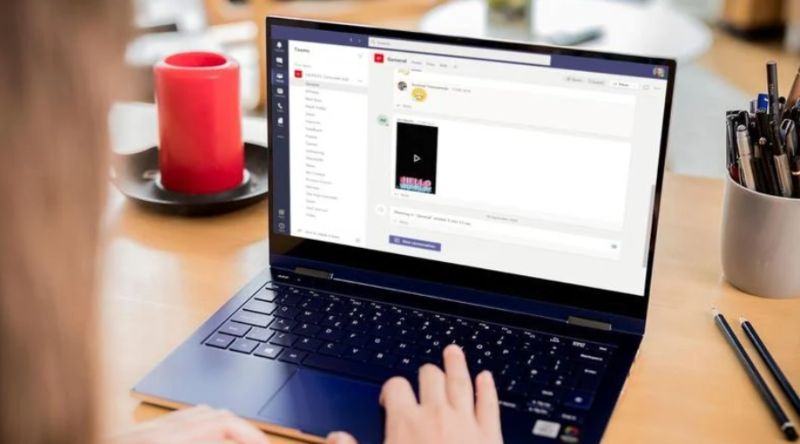
Microsoft Teams has become one of the most successful tools during the coronavirus pandemic. Learn to master it with these tips and tricks that we show you.
If you use Microsoft Teams regularly, you are probably already familiar with the basics of the application. Changing your appearance, creating separate teams, or collaborating on documents, and screen sharing are things most people know how to do.
However, even if you feel comfortable with the tool, you should know that there are lesser-known features that Microsoft does not highlight, but that it is convenient to know to move with ease in your video calls.
That’s why we’ve put together 10 valuable tips and tricks to help you get the most out of Microsoft Teams. This covers both basic and more advanced functions, although Windows is not always available on Mac and vice versa.
Share screen
The screen sharing feature in Microsoft Teams is perhaps one of the most used in video calls, and yet people often have a hard time finding it. When you have an active call, click on the ‘Share tray’ button on the bottom bar.
This bar is sometimes hidden during the video call, but by clicking anywhere on the screen, it reappears. The function allows you to share the entire desktop, the open window, or a specific application.
Messages during a video call
During video calls, there are situations in which you may have to introduce yourself to a group or to express an opinion without interrupting the speaker. To open the chat channel, click on the speech bubble icon to the right of the bar.
A window will open on the right in which you can write your message, or check what others have written. Everyone will receive a pop-up notification when new messages are sent.
If the call was established on a specific channel or group, these messages will still be available after the call has concluded.
Record meetings
Recording a meeting can be tremendously useful, especially if you are following an online class or high-interest training talk. Also for those cases in which you have to share the meeting with someone who could not join the call.
To record the meeting, click on the three menu items shown above and select ‘Start recording’. Both the images and the audio will be recorded and then stored under a file.
Please note that all participants will be notified that the call is being recorded, with images and audio available as a video shortly after the meeting ends. The host can also choose to share it externally.
Create subgroups with specific labels
You may want to talk to specific team members about a certain topic, but you would rather not go through the hassle of creating an entirely new channel.
That’s where tags come in, allowing you to group people based on their type of work or a specific project. Your company administrator may have to enable this feature for all members, but it is worth doing.
- Click on ‘Teams’ on the left panel and find the team of people you are looking for.
- Hover over it and click on the three dots.
- Select ‘Manage Tags’.
- Choose the people you would like to add to a specific tag and what you would like to call them.
Now you can use these tags to @mention this specific group of people, safe in the knowledge that only what you share will be notified to them.
Use Microsoft Outlook and Teams together
Teams are designed to be a single window for collaboration, so it can be a bit cumbersome to have to go out to a separate application to manage email while taking a video call.
However, Microsoft now allows you to integrate two tools like Outlook and Teams, which means that you can compose a message in Teams that is also sent as an email.
To use this feature, you will first need to send the message in Teams. Then hover over the specific message and click on those same three dots from before. Click on the option that says ‘Share in Outlook’.
Assuming Outlook is linked to the same Microsoft account as Teams, you will be prompted to select any recipient and add appropriate comments.
Save chats for the future
By touching those same three dots in any message, you can also save the conversations for future reference. Once saved, you can access them by clicking on your icon in the upper right corner and choosing ‘Saved’.
Mute and hide notifications
Notifications are great until you are bombarded with them. Teams give you control over who can and cannot send you notifications, which can be useful if you are a member of many active channels.
For specific channels, head over to the ‘Teams’ heading and hover over the channel you want to change notifications for. Click on the three dots that appear and then choose ‘Notifications’ for the channel.
You will then have options for ‘All Activity’, ‘Off’ or ‘Custom’. For a particular chat, choose ‘Chat’ in the left panel and click on the same three dots. You will see the option to ‘Mute’ that particular conversation.
Use different accounts
With Microsoft encouraging people to use Teams for widespread use as well, it’s clear that some will want to be able to switch between personal and work accounts. There is no in-app solution yet, although you can run a separate version of Teams.
Opting to use the application in web mode may be a solution. Head to teams.microsoft.com to get started, although you may need to sign out of your account before you can sign in to another.
Add important apps
It can be annoying to have to switch between multiple apps all the time, especially if you use the same handful every day.
To add an application, you will simply have to click on the ‘+’ icon next to the person or channel you have selected and chosen from a large selection of applications. If you don’t see that option, it means that the owner hasn’t granted you permission for the changes.
Collaborate on Microsoft Office documents
Microsoft’s Office applications have come a long way since they focused on real-time collaboration, so people can share and edit documents directly within the Teams interface, without changing apps.
We encourage you to check out this related content: Fun things you can do in Microsoft Teams.
Since the Zoom tool is another great alternative, we offer you an article on how to go beyond the 40-minute limit of Zoom video calls.
How-To
How to Fix Blurred Images/Photos on Android Phones

Why your photos can be blurry (blurred) There are several factors that cause them, including: When taking photos it is unstable (shaky), the object you are photographing is a moving object, the camera lens is dirty, the camera application is not functioning properly and several other causes.
How to Fix Blurry Pictures Taken from Android Phone:
1. Use an app to fix blurry photos
Most image editing apps include a useful function to sharpen photos, this feature you can use to improve your Android photos.
As for the method, I have discussed it in a previous article here
Or you can also try other apps like VanceAI and Neural. love, Let’s Enhance, and MyEdit
2. Take precautions so that the photos are not blurry
Tips for preventing blurry images on Android phones, there are several things you can try to prevent this, including:
- Clean your phone lens
- Take photos in better lighting conditions
- Delete the Camera application cache, go to the menu: Settings > Storage > Devices > Cached data > Clear cached data > OK.
- As much as possible, avoid excessive zoom functions when taking photos on an Android cellphone camera.
How-To
How to Fix Spotify AI DJ Not Showing

As a music streaming service, Spotify has revolutionized the way we listen to music. One of its most exciting features is the AI DJ, which creates custom playlists based on your music preferences. However, sometimes users encounter an issue where the AI DJ feature is not showing up. In this article, we will go through a step-by-step guide on how to fix this issue.
Step 1: Check for Updates
The first thing you should do is check if your Spotify app is updated. If not, update it to the latest version. This may resolve any glitches or bugs that are causing the AI DJ feature to disappear.
Step 2: Clear Cache
Clearing the cache on your Spotify app may also help resolve this issue. To do this, go to your app settings and select “Storage.” From there, tap on “Clear Cache” and restart your app.
Step 3: Disable Battery Saver
Sometimes, battery saver settings can interfere with the app’s performance. To disable the battery saver, go to your phone’s settings and select “Battery.” From there, disable any battery-saving modes that are enabled.
Step 4: Check the Internet Connection
Make sure that you have a stable internet connection. If your internet connection is slow or unstable, the app may not be able to load the AI DJ feature.
Step 5: Check Country Settings
Spotify’s AI DJ feature is not available in all countries. If you’re using the app in a country where this feature is not available, it may not appear on your app. You can check the list of countries where the AI DJ feature is available on the Spotify website.
Step 6: Check the Subscription
The AI DJ feature is only available to Spotify Premium subscribers. If you’re using the free version of the app, you may not be able to access this feature.
Step 7: Reinstall the App
If none of the above steps work, you can try uninstalling and reinstalling the app. This will reset the app to its default settings, which may resolve any issues that were causing the AI DJ feature to disappear.
Step 8: Restart Your Device
If the issue persists, try restarting your device. This can help fix any software issues that may be causing the problem. Here’s how to do it:
- Press and hold the power button on your device.
- Tap on the “Restart” option when it appears on the screen.
- Wait for your device to restart, and then try opening the Spotify app again.
Step 9: Contact Spotify Support
If the issue persists after trying all the above steps, it’s time to contact Spotify support. You can reach out to them through their website, and they will guide you through resolving the issue.
Conclusion
Spotify’s AI DJ feature is a great way to discover new music based on your preferences. However, it can be frustrating if it’s not showing up on your app. By following the steps outlined above, you should be able to resolve the issue and get back to enjoying your music. Remember to check for updates, clear cache, disable battery saver, check internet connection, country settings, and subscription, and reinstall the app. If all else fails, don’t hesitate to contact Spotify support.
How-To
How to Overcome steam error code e84

The steam error code e84 problem usually occurs when we are about to log into the Steam platform, this error is also accompanied by Something that went wrong while attempting to sign you in.
If you are currently experiencing the same error. So in this article, we are going to provide you with the repair solution with the simplest way to fix it.
1. Delete Temporary Files
Temporary Files on your computer can sometimes make Steam run improperly. One is the steam error code e84, so try deleting temporary files from your computer. To do so, follow these steps:
- Press the Windows key + R then type the command %temp% and press the Enter / OK key
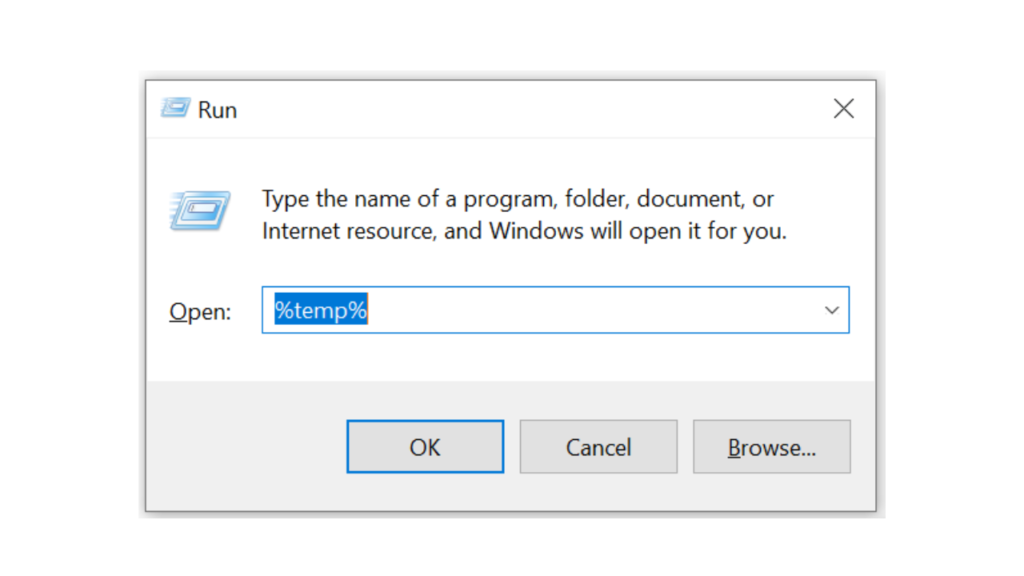
- Then delete all files and folders in the temp folder
- After that, try restarting your computer, and try opening Steam, is the error code E84 still there?
Deleting all of these folders will not cause errors or damage to the computer/programs on your computer, because all the files in this temp folder are temporary files that are no longer needed.
2. Update the Steam Application
Check if there is an update available for the steam application, if there is, please update immediately. And after the update is complete, try opening the Steam application again.
3. Reinstall the Steam App
If the two methods above don’t work, there could be some problematic or damaged Steam system files. The best solution is to reinstall the Steam application.
-

 Phones5 years ago
Apple iPhone 11 (2019) – Release, Info, Leaks, Rumors
-
![Huawei's New Operating System is HarmonyOS [ Officially ],harmony os,huawei new operating system, huawei harmony OS,](https://www.thedigitnews.com/wp-content/uploads/2019/08/Screenshot__2285_-removebg-preview-2-1-400x240.png)
![Huawei's New Operating System is HarmonyOS [ Officially ],harmony os,huawei new operating system, huawei harmony OS,](https://www.thedigitnews.com/wp-content/uploads/2019/08/Screenshot__2285_-removebg-preview-2-1-80x80.png) Phones5 years ago
Phones5 years agoHuawei New Operating System is HarmonyOS [ Officially ]
-

 News5 years ago
Belle Delphine bath water – Instagram Model Sells Used Bathwater For 30$ To Their Loyal Followers
-

 Tech5 years ago
Levi’s Bluetooth Jacket Lets You Control Your Smartphone


